Pages

Wednesday, February 21, 2024

Scrappy Easter Egg Table Runner Tutorial

 Hello Friends! Happy Wednesday!

I have a very quick Easter table runner project to share with you today.

Easter Egg Quilted Table Runner

This table runner finishes at 14 x 21 inches, and is perfect way to use some scrap fabrics that scream spring! I used a modified quilt as you go technique to make this runner.

Step 1: Create Pattern

I freehanded my pattern on to muslin fabric.  If you are not comfortable drawing your own shape I found this egg shaped placemat tutorial that includes a downloadable template that can be easily adjusted to create a larger egg shape.

Egg shape pattern


Step 2: Trace Pattern

Trace your newly created pattern on to batting. I used a sharpie, the tracing doesn't need to be perfect, we are only looking for an outline to help with fabric placement.


Step 3: Arrange fabric

Arrange your scrap fabrics on top of the batting in the order you want them to appear on the table runner.


Starting in the middle place your first strip face up on the batting, and the second strip of fabric face down on the previous strip.

Sew with a quarter inch seam.

Press the strip back onto the batting and place the next strip right side down on the strip just sewn.  Feel free to press with your iron or simply finger press.

Continue adding strips in the same way until you reach the end of your egg shaped outline.

Once all the strips are sewn, press the entire quilt top. At this point you can trim away the excess fabric.

Step 4: Baste to Backing

I spray based my backing  to the quilt top.


Step 5: Quilt and Trim

At this point you can quilt as desired. I did simple straight stitching a quarter inch away from the seams.

Once the quilting is completed just trim the excess fabric and batting away. 

This was so much fun I actually made two runners at the same time.


Step 6: Cut out pattern

Pull out the pattern you created earlier to cut out from your quilted top.


Step 7: Stay Stitch Edges

I prefer to stay stitch around the perimeter, but it's not necessary.


Step 8: Bind and Enjoy

Since the table runner has a curved shaped I made bias tape to use as binding.


This was a fun project, if you decide to make one for yourself I hope you enjoy the process as much as I did!

Until next time ,craft the life you love ❣

Thursday, February 1, 2024

Scrappy Log Cabin Star Wall Quilt

 Hello Friends! Happy Thursday!


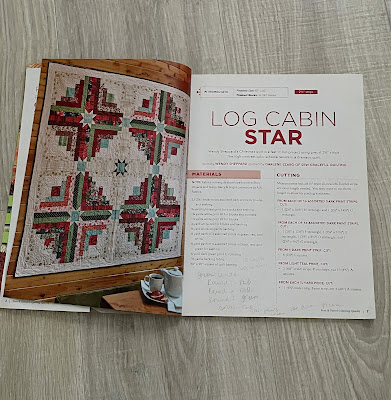
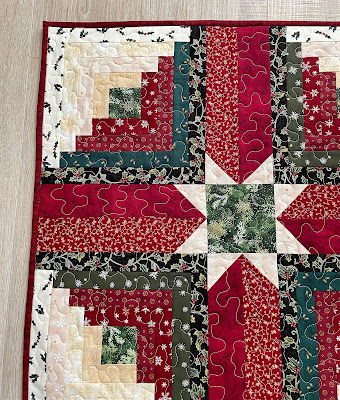
I fell in love with a quilt designed by Wendy Sheppard in the Nov/Dec 2017 edition of Quilting Quickly. It's been on my someday list since the magazine arrived at my home.

Log Cabin Star Quilt Pattern


I finally decided now was the time for me to make my version. The finished size for the quilt in the pattern is 82 x 82 inches, with each log cabin block finishing at 16 inches. 

With the fabric I'd chosen I needed to make smaller log cabin blocks, finishing at 12 inches. I pulled out my trusty 12 inch Log Cabin Trim Tool and got busy.

I LOVE how this wall hanging turned out!


Log Cabin Star Wall hanging


Log Cabin Star Quilt


What do you think? This one is for the shop but the next one is for me!

Until next time....craft the life you love ❣
Tuesday, January 30, 2024

More Simple Scrap Fabric Ideas

 Hello Friends! Happy Tuesday!

Specialty Rulers

I love specialty rulers! Yes, they can be expensive and not necessarily needed, but they are my passion/obsession. 

I tend to adapt patterns or purchase patterns that require rulers I already own so I don't feel like I've wasted money.

Creative Grids is my preferred ruler brand because of their exclusive grippers that hold fabric in place while cutting.

Today I'm sharing two more finishes using scraps and specialty rulers.

Basket Quilt Block

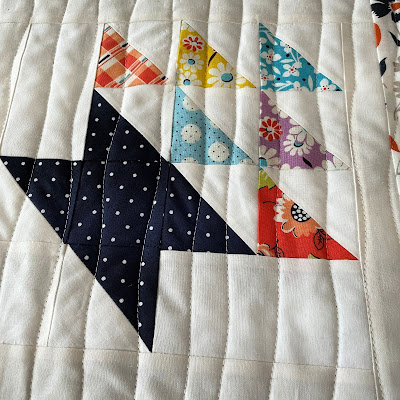
The basket quilt block is a simple block using half square triangles and rectangles. After doing a google search I sketched out a basket quilt block I wanted to make using my Creative Grids Half Square 4-in-1 Triangle Quilt Ruler.

Handmade Quilted Table Topper - Scrappy Vintage Basket

I chose this ruler because it allows me to make one at a time half square triangles and it's smaller than my other Creative Grids half square triangle ruler.

I learned to make half square triangles many years ago from Bonnie Hunter using the easy angle ruler and this Creative Grids ruler is based on the same concept of using strips of fabric to make half square triangles.

basket quilt block

scrappy basket quilt block


I made four 8 inch basket blocks, added 3 inch sashing which included a pieced heart quilt block in the center. The first border in white is 1.5 inches wide and the floral second border is 2.5 inches wide, making the finished size 26 x 26 inches.  I'm showcasing it as table topped but did include corner pockets on the back  if the buyer prefers to hang it on a wall.


                        scrappy basket quilt


corner pockets for hanging


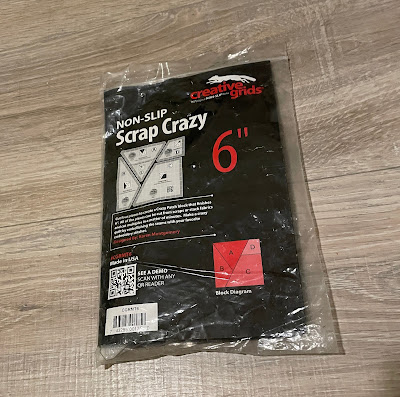
Scrap Crazy 6 Templates


scrap crazy 6 templates


I was able to create 6 inch finished blocks with the 4 acrylic templates in this set, using odd shaped scraps in my stash.

This set of templates was designed by Karen Montgomery, I was really intrigued with her video introducing the scrap crazy ruler set. It's really one of my favorite tools for making scrappy projects.

The crazy patch 6 inch blocks were used as the center square in my scrappy 12 inch star blocks. Again I used the 4 - in -1 half square triangle ruler to create the  3.5 inch star points.

scrap crazy 6 star quilt block


scrap crazy 6 star quilt block

Scrap crazy 6 star quilt block

The fabrics used for both projects are from old Denyse Schmidt collections, I love the vintage and retro looks of the beautiful bright prints.

I loved how both scrappy projects turned out and plan on including them in my 2024 Spring collection for the shop.

Until next time, craft the life you love ❣

Thursday, January 25, 2024

More Small Quilting Project Finishes

 Hello Friends!  Happy Thursday!


Now that I'm back home I'm trying to finish up WIP's so I can get them listed in my ETSY shop.

Log Cabin Table Topper

I'm sure you can tell I love log cabin quilt blocks!  I was super happy when a customer wrote and asked if I could make a Christmas log cabin table topper for her in red and green. 

I still had some scraps from two of Kate Spain's old Christmas fabric collections (Joy and Solstice) and made this small topper for her. I used the 10 inch Log Cabin trim tool by Creative Grids to create the 4 quilt blocks.

Christmas Log Cabin Table Topper - Kate Spain Fabrics

Christmas Log Cabin Table Topper - Kate Spain Fabrics


Log Cabin Placemats

I used the 6 inch log cabin trim tool to create the side panel for this set of 4 placemats. I didn't have a pattern, I made a cutting error in a previous project and decided to incorporate my "oops" into something cute!

Log Cabin Placemats


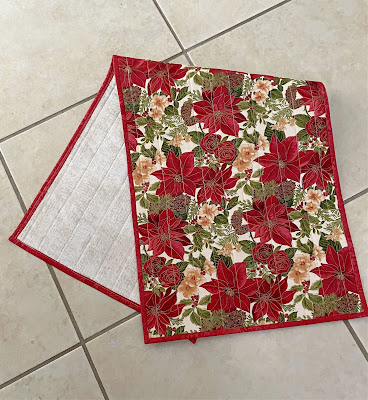
Poinsettia Table Runner

I fell in love with this fabric and didn't want to cut it up. I bought enough to make 4 runners in different sizes.  

Poinsettia Table Runner


Until next time craft the life you love ❣

Tuesday, January 23, 2024

Quilted Mug Rugs

 Hello Friends!  Happy Tuesday!


Quilted mug rugs are a charming way to use up scraps by making something cute and functional!

What is a mug rug?

 A quilted mat that is bigger than a coaster and smaller than a placemat.

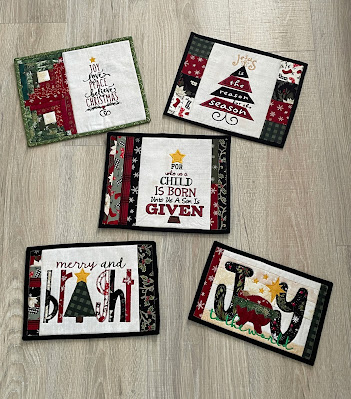
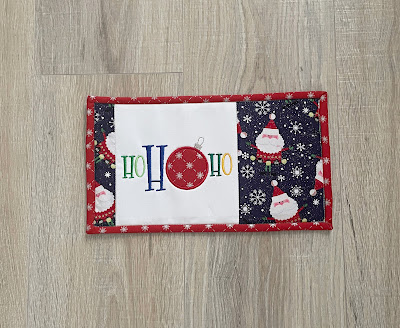
Below are a few more mug rugs that I made for the shop. I didn't use a pattern for any of the layouts, I let the size of the scraps and embroidery design dictate my decision making. The mug rug sizes vary between 6 x 9 and 6 x 10 inches.

I hope you enjoy!

Christmas Quilted Mug Rugs with Embroidery

Christmas Mug Rug

Handmade Christmas Mug Rug with embroidery

Handmade Christmas Mug Rug with embroidery

Until next time...craft the life you love ❣

Thursday, January 18, 2024

Making A Wood Sign with Cricut

 Hello Friends! Happy Thursday!

Wooden Signs

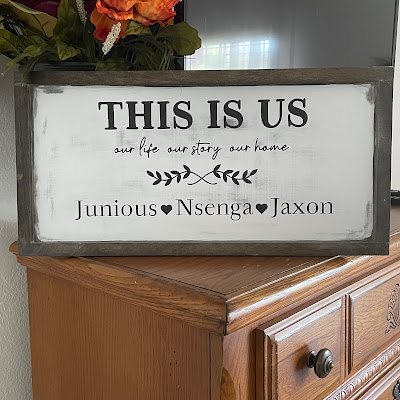
I had a vision to create a wooden sign for our home office. The walls in our office are decorated with pictures of the kids. Hubby and I have been together 23 years and our 5 kids came from previous marriages.  We feel very fortunate and blessed that both families love and respect each other, I wanted a wooden sign that reflected those feelings.

If you've read any of my previous posts you know that I'm a connoisseur of Pinterest and YouTube when I want to try something new 😊!  I'm confident creating my own quilt patterns but DIY crafting is still new to me so I love combining tips and techniques from others into my projects.

Permanent Vinyl On Wood

I love the simple style of beaded wood frames. You can find them in most craft stores in a variety of shapes and sizes and in most cases a hefty price tag.

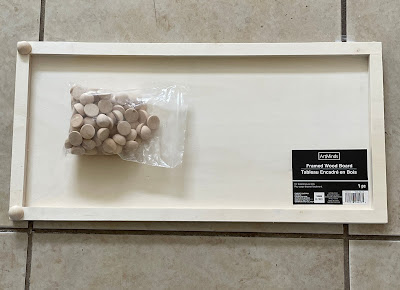
I purchased this bundle of  10 x 20 inch unfinished framed pallet boards from Michaels after Christmas at 60% off. I also purchased half wooden beads from Amazon to make my own beaded frame.

Wood Sign with Cricut Materials


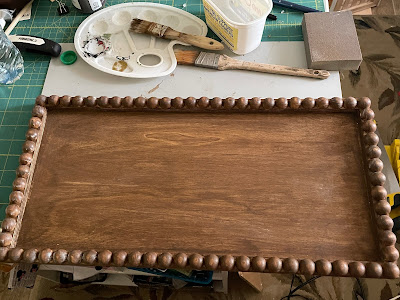
I used wood glue to adhere the half wood beads onto the perimeter of the pallet board. Once the beads were dry I wiped the entire board with a cotton cloth to remove dust and any glue residue. I then painted the entire unit with Waverly Anitque Wax  and added a little distressing around the edges using white acrylic paint.

Wood Sign Using Cricut


Once the unit was dry, I didn't like it so I taped off the inside to create a border and added Waverly chalk paint in Ink to the center. 


Wood Sign Using Cricut Premium Vinyl


Wood Sign Using Cricut Premium Vinyl

While the black paint was drying I cut the vinyl decal using my Cricut Joy. I really like using Oracal 651 for my permanent vinyl projects, it comes a variety of colors, it weeds beautifully, and the price is reasonable.

Wood Sign Using Cricut Premium Vinyl


My thoughts -- I'm OK using the sign in my home. I wouldn't use permanent vinyl on a sign that I was going to sell or gift.  In my opinion the vinyl looks like a sticker that can easily be removed or over time lift. 

Heat Transfer Vinyl On Wood

My next attempt at making wood sign I used Siser EasyWeed Heat Transfer Vinyl (HTV) and my Cricut Heat Press. I used the Cricut Maker to cut out the design.

I gifted this sign to my daughter.

Wood Sign using Cricut and Heat Transfer Vinyl

The matte finish of the HTV makes the text look like it was painted on and part of the wood. I was much happier with the results of this sign.

On my to do list is to test making a wood sign using Cricut Stencil Vinyl. Hopefully I'll get to it soon!

Until next time... craft the life you love ❣


Tuesday, January 16, 2024

Small Quilting Projects and Gifts

Hello Friends! Happy Tuesday!

Small Quilted Gifts

I needed a few last minute gifts before I traveled to Texas to spend time with my daughter and her family.

Pocket Potholder & Kitchen Towel

Handmade Potholder Kitchen Towel Gift Set


I made this adorable kitchen towel and potholder set for one my daughter's friends.  I used scrap 10 inch squares from the Pie Making Day Fabric collection. The prints have a vintage/retro vibe to them and thought they'd be perfect for her.

The potholder pocket front is a 6 inch log cabin quilt block with a 1.5 inch border. Pocket potholders are my absolute favorite and using orphan quilt blocks as the pocket is a bonus! I was inspired by this tutorial from Accuquilt.

Sewing together the scraps from the potholders I was able to create the band around the kitchen towel.

Cosmetic Bags

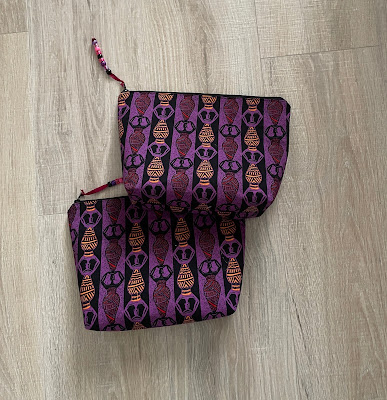
Cosmetic bags are great for keeping small necessities organized while on the go. These were made for the ladies at the hair salon.

Handmade Cosmetic Bags


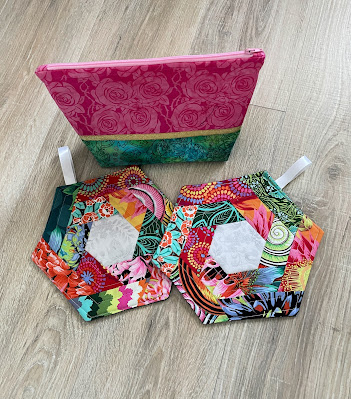
Another good friend of my daughter is a member of the AKA sorority whose colors are pink and green. I used pink and green Kaffe Fassett and Amy Butler scraps to make the hexagon shaped trivets/mug rug. The cosmetic bag was made from pink and green batik scraps. 

Handmade Cosmetic Bag in Pink and Green


Tote Bag

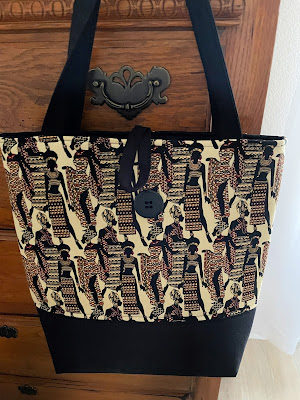
This last gift was perfect for the woman who is like a second mom to my daughter and great friend of mine. She's a classy woman and I thought the regal African women in this Michael Miller print was perfect.

Handmade Quilted Tote Bag

Handmade Quilted Tote Bag


The tote bag measures 16 x 14 inches. I used foam instead of batting or fleece and love, love the results.  I added both a zipper pocket and slip pocket on the insides of the tote bag. I originally had planned on adding a recessed zipper but didn't have anything long enough on hand to use. To fasten the bag I used a button and loop. Using the remaining fabric I made a  matching cosmetic bag.

Gifts For Me

3 Piece Toiletry Gift Set

I love taking my favorite quilts on the road! I've been gone for a month on this trip so I had to bring a lot more necessities.

I combined my love of sewing and crafting to create this gift set.

Small Quilted Toiletry 3 Piece Handmade Gift Set

Small Quilted Toiletry Handmade Gift Set


I was inspired by this tutorial by Alanda Craft for the roll up bag. I modified the pattern to fit the scrap fabric I had on hand and adjusted the pocket/slots to fit deodorant, moisturizers, face wash, toothbrush and tooth paste.

I tend to prefer roomier/larger cosmetic bags, this one measures 7.5 x 10.5 inches. I used the remaining scraps from the roll up bag for the bottom portion of the cosmetic bag giving the gift set a more coordinated look.

Using the Cricut Joy and some white glitter iron on vinyl I embellished both sides of the cosmetic bag. The smaller cosmetic bag was made from scrap canvas and measures 5 x 8 inches, I also used glitter vinyl to decorate the bag, which contains make up brushes and beauty sponges.😀

Kindle Cover

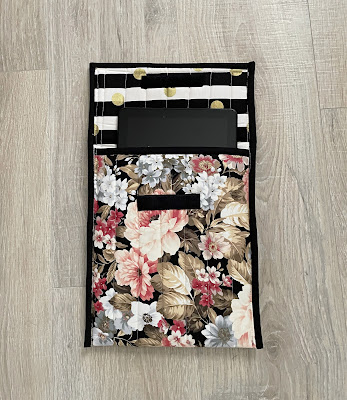
After having success using foam in the tote bag I decided to try it again and made a new cover for my Kindle. I'm so in love with using foam! 

Yes, foam is thicker but smooth to sew on, and no difficulty trimming out bulk from the seams.

Handmade Quilted Kindle Cover Using Foam

Handmade Quilted Kindle Cover


I have seen others use foam in their bag making and recommend Bosal or Annie's as their brand of choice.  Our local quilt shop carries both but the price was way more than I wanted to spend so I purchased Pellon Flex Foam from JoAnn Fabric Store, and was quite happy with the results.

Do you use foam in your bag making? Do you have a preference?

Until next time....craft the life you love ❣
Thursday, January 11, 2024

Empty Liquor Bottle Vase Ideas

 Hello Friends! Happy Thursday!

Liquor Bottle Vases

We are a family that enjoys a good drink on a regular basis and save many of the bottles so that the recycling guy doesn't judge us 😉  I love all the shapes and sizes that are used to make liquor bottles special and really enjoy giving new life to the empty bottles as vases to decorate our home.

Sometimes it can be time consuming and frustrating removing labels from the bottles but the beauty of the finished item makes the removal journey so worth it. I don't have a secret method for label removal - I start with soaking in hot soapy water and then go from there! If you have a tried and true method please feel free to share!

I like to spray paint the liquor bottles and pair them with floral and greenery to add a bit of cheer in my home especially for holiday and seasonal decorating. I use Rust-O-Leum 2X Ultra Cover Spray Paint, it provides great coverage, smooth finish, dries quickly, and comes in a variety of colors. Although it is not specified for glass, I find it sticks well and I haven't had any peeling issues.

Today I am sharing a few examples of how I gave new life to empty liquor bottles from our recycling bin.

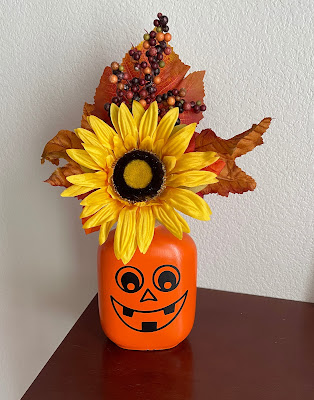
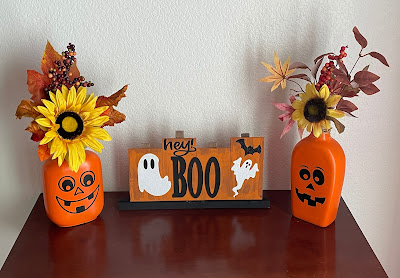
Halloween - Jack O Lantern

Empty Liquor Bottle Halloween Vase Decor

Empty Liquor Bottle Halloween Vase Decor

Empty Liquor Bottle Halloween Decor Vase with Vinyl


Bottles used here were originally Tequila and Whiskey. I used Rust -O-Leum 2X Ultra Cover Gloss in Real Orange for these and added Jack O Lantern faces cut from adhesive vinyl using my Cricut Joy machine. Flower picks were purchased on clearance at JoAnn Fabrics.

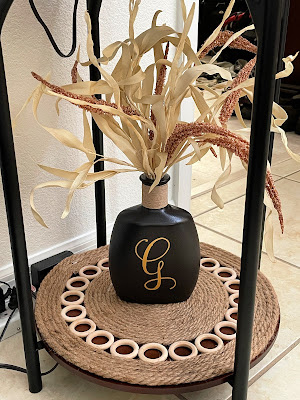
Personalized Vase

Empty Liquor Bottle Vase Personalized with Vinyl


This bottle was originally Woodford Reserve Bourbon Whiskey - my personal favorite!

I used Rust-O-Leum 2X Ultra Cover Metallic in Oil Rubbed Bronze for this vase. I cut the letter G out of metallic adhesive foil vinyl in gold with my Cricut Joy and wrapped the neck of the bottle with twine. The floral bundle was purchased from Hobby Lobby. I made the lovely mat under the bottle using nautical rope and bamboo wood rings. I was inspired by something I saw while shopping and decided to create my own version.

JOY Wine Bottle Decor

JOY Christmas wine bottle decor using Cricut


I used Rust-O-Leum 2X Ultra Cover Gloss Spray Paint in white for these larger wine bottle vases. I wrapped red black gingham plaid ribbon near the bottom of each wine bottle securing with hot glue. The J & Y were cut on my Cricut Joy using red adhesive vinyl, and I glued a small wooden snowflake representing the letter O to the middle bottle.  The red glitter branches were purchased from JoAnn Fabrics.

Wine Bottle - Cutting

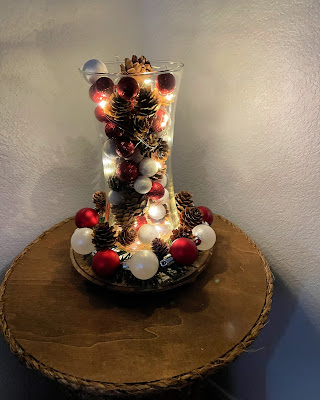
Liquor Bottle Upcycle


This was originally a wine bottle  -- I was teaching myself how to use a glass cutter. I definitely need more practice. I decided not to paint the vase fearing that the paint would show the imperfections in my cutting. I stuffed the glass vase with ornament filler, pine cones, and fairy lights. I made the riser out of scrap wood with a matching wreath ring using the same vase filler items.

Bourbon Bottle Vases

Upcycled Bourbon Bottle Flower Vases


These were originally bourbon bottles I spray painted using the Rust-O-leum 2X Ultra Cover Satin Spray in Blossom White and Heirloom White. I was going for a more rustic look so I used lace, burlap, and twine to dress up the vases. I made the rustic wooden candle holders shown in the photo, I plan to write how I made them in a future post. The eucalyptus stems were also from my clearance haul from JoAnn Fabrics.

The last vase I have to share was originally a flavor infused Olive Oil bottle.

Flower Vase - Infused Oil Bottle - Upcycle


I used black Rust-O-Leum American Accents 2X Ultra Cover Matte Spray paint on this vase.

If you were planning to up-cycle your old liquor bottles into something beautiful and functional, I hope I have inspired you with these vases!

Until next time, craft the life you love❣

Back to Top